We have already stepped into the AI world where creating videos/photos takes about a minute and requires no knowledge, writing essays requires no academic knowledge, etc. It all started with OpenAI making its AI chatbot – ChatGPT free for the public.
ChatGPT has already witnessed massive success, and following it, other AI chatbots have been made, like Microsoft Copilot. While Copilot is powered by the same GPT Model that powers ChatGPT, it provides access to the latest GPT-4 and GPT-4 Turbo models.
Recently, Microsoft also introduced the premium version of Copilot, which is called Copilot Pro. In case you are confused about Copilot Free and Pro, check out the detailed comparison of Copilot Free vs Copilot Pro.
This article will discuss the Copilot Plugins and how you can enable and use them on a chat. Let’s explore Copilot Plugins and how to get started with it.
Also read: Download Microsoft Copilot App (Latest Version)
What are Copilot Plugins?
Copilot Plugins are very similar to ChatGPT Plugins. However, ChatGPT allows adding plugins only on its premium version, but Microsoft provides you with this feature for free.
Plugins on Copilot are basically add-ons that extend the capabilities of the chatbot. These plugins give Microsoft’s AI Chatbot the ability to connect to other services & offer additional features.
For example, there’s an Instacart plugin available on Copilot that tells you about the recipes and shows you all the ingredients you will need. You can purchase the ingredients directly and get them delivered from local stores.
Now that you know what copilot plugins are, it’s time to know how to enable & use them. Follow some simple steps we have mentioned below to get started with using the plugins.
1. To get started, open your favorite web browser and visit the web version of Copilot.
2. Now, make sure to sign in with your Microsoft account.
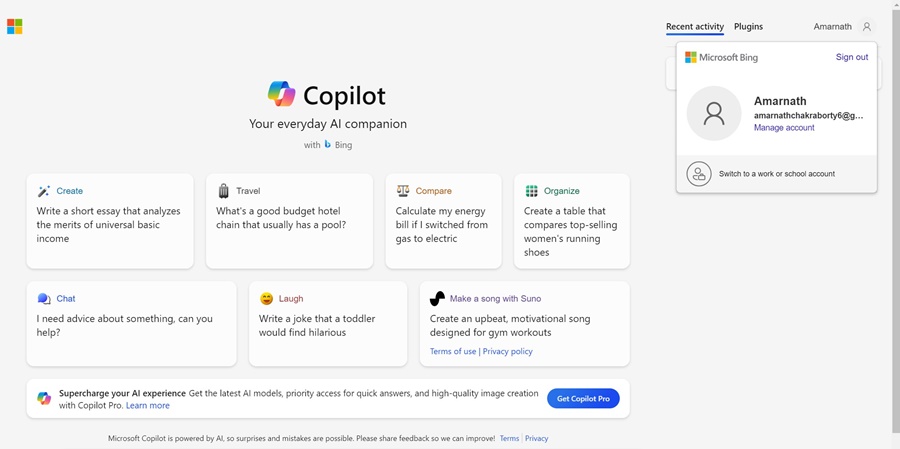
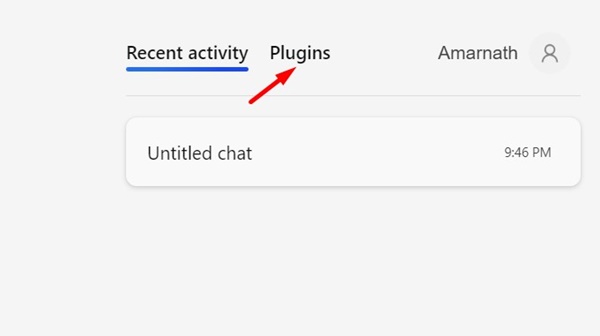
3. create a new topic and click the Plugins tab in the top right corner.
4. You will be able to see all available plugins that you can enable & use with the AI Chatbot.
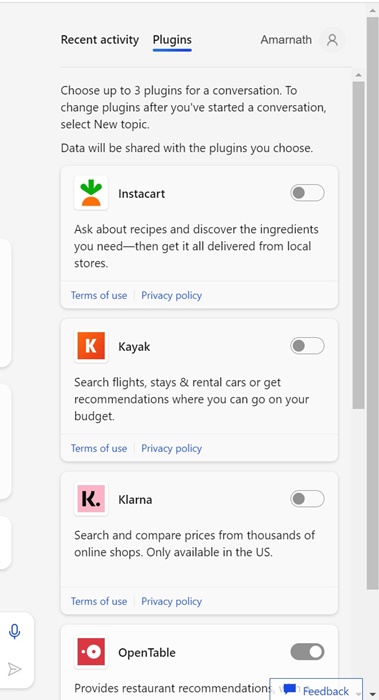
5. Activating a plugin is super easy; turn on the toggle switch next to the Plugin name.
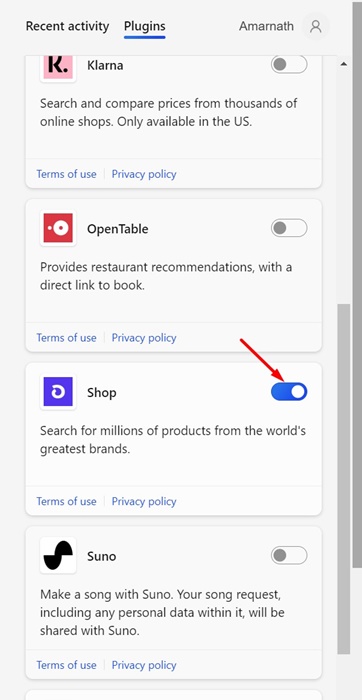
6. For example, I have enabled the Shop plugin since I want hair trimmer recommendations. Simply turn on the toggle next to the Shop Plugin to activate it.
7. To make sure Copilot is connected to the Plugin you’ve activated, you can simply ask, ‘Are you connected to the [Plugin Name] plugin? Or else, you can continue to converse with it.
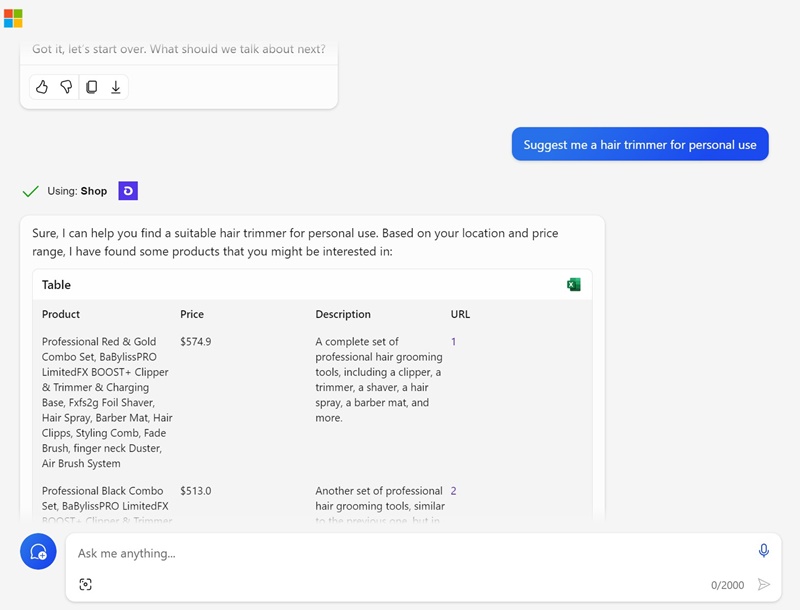
8. Microsoft Copilot enables up to 3 different plugins for a conversation. The search plugin should remain enabled for all other plugins to function.
That’s it! This is how you can enable and use Copilot Plugins in easy steps.
What are the available Copilot Plugins?
As of now, Copilot offers you six different plugins. Below, we have mentioned the plugin names and what they do.
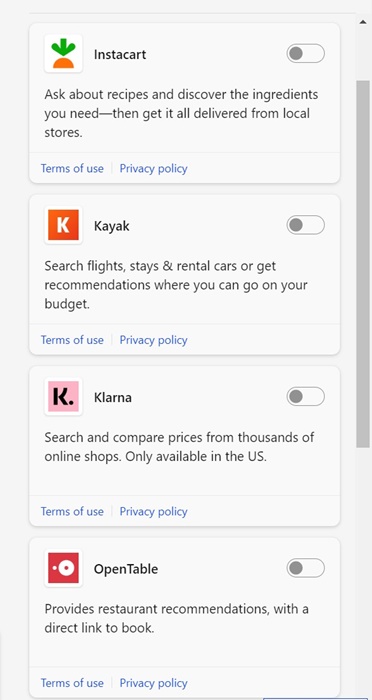
Instacart: This one lets you ask about recipes and discover the ingredients you’ll need.
Kayak: This plugin lets you search flights, stays & rental cars or get recommendations on where you can go on your budget.
Klarna: This one lets you search & compare prices from thousands of online shops.
OpenTable: This plugin gives you recommendations on restaurants. It also provides a direct link to book a restaurant.
Shop: This plugin lets you search for millions of products online.
Suno: This is a pretty good plugin that lets you use AI to create songs with simple prompts.
These are the available plugins on Microsoft Copilot that you can enable and use for free.
So, this guide is about how to start with Copilot Plugins. While Copilot offers you six plugins at the time of writing, the chatbot is expected to get more plugin support soon. Let us know if you need more help in using Copilot Plugins.
